How Hit-Air Works
How To Set Up Your Hit-Air Vest
Ready to invest in your protection?
Follow our measuring guide below to
find the right style and size Hit-Air vest for you!
Once you have your vest, follow our set-up guides to get ready to ride.
Measuring Guide
HOW TO MEASURE
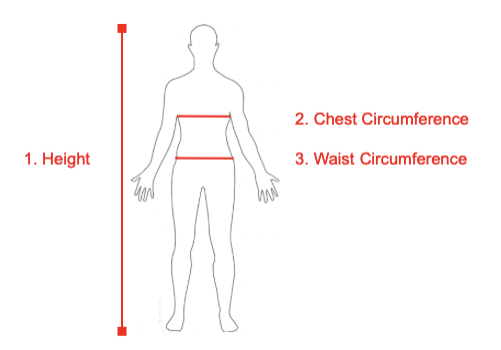
Vest sizing is determined by 3 different measurements: height, chest circumference, and waist circumference. All vests have an adjustable waistband and will fit a range of height, chest, and weight measurements.
If you plan to wear your Hit-Air vest over a hard protective vest or heavy outerwear, sizing measurements should be taken over the hard vest or outerwear.
Size charts for each vest model can be found on the product pages.
Which Hit-Air Vest is Best for Your Body Shape
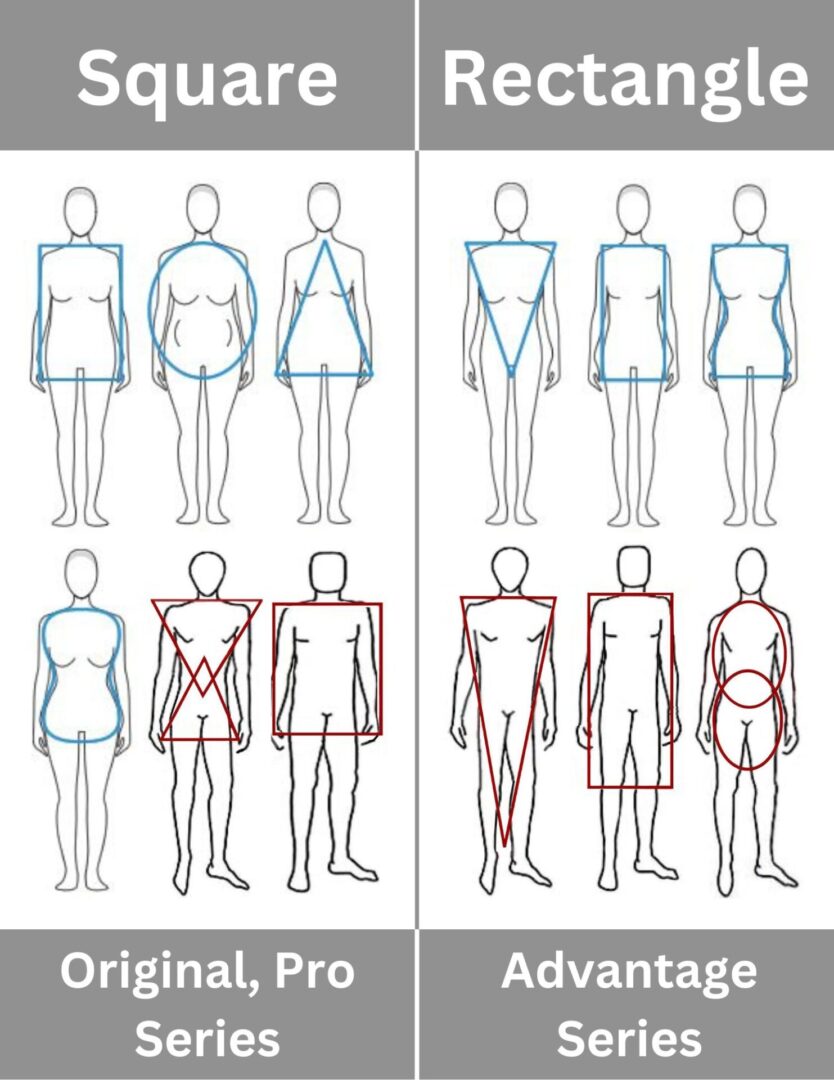
We have 3 "square cut" adult vest models - the Original Super Light Weight, the Pro 3, and the Pro Max. Square cut vests tend to fit shorter, curvier torsos better than other models.
We have two "rectangular cut" adult vest models - the Advantage H2 and the Advantage Max. Rectangular cut vests tend to fit longer, straighter torsos better than other models.
How To Determine Your Body Shape:
If your torso width is equal to or more than half of your torso length, a square cut vest is likely best for you. If your torso width is less than half your torso length, a rectangular cut vest is likely best for you.
Still have questions? Email us at info@hitairsports.com with any advanced fitting and sizing questions.
A PROPERLY FITTED HIT-AIR VEST
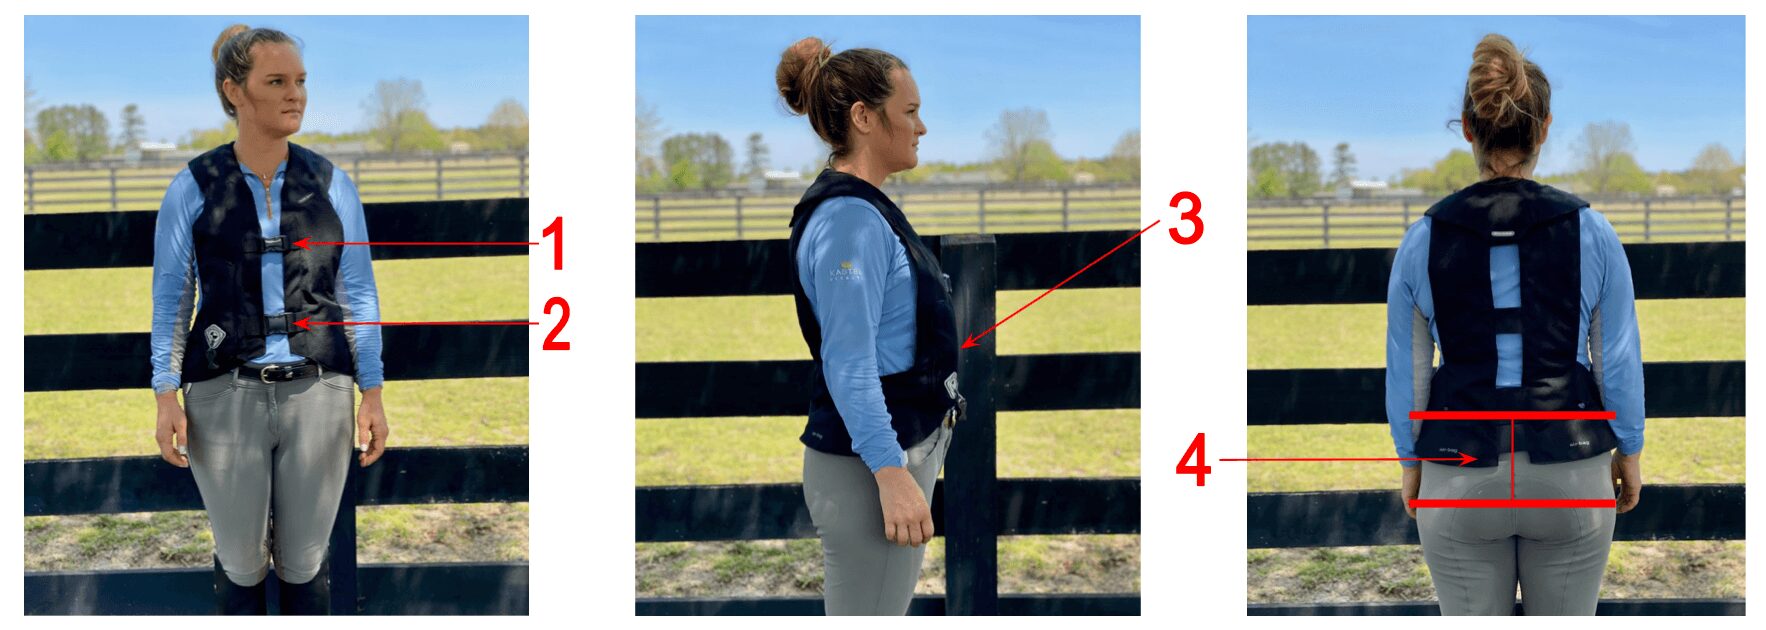
1 . The top front buckle lays across the center of the rider’s chest
2 . The bottom front buckle lays in line with the top of the rider’s hip bones
3 . The cartridge pocket faces forward and out of the way of the rider’s arm
4 . The back of the vest ends between the rider’s belt loops and seat bones
5 . The vest should lay flat and snug against the rider’s shoulders, chest, back, and hips.
Set-Up Guide
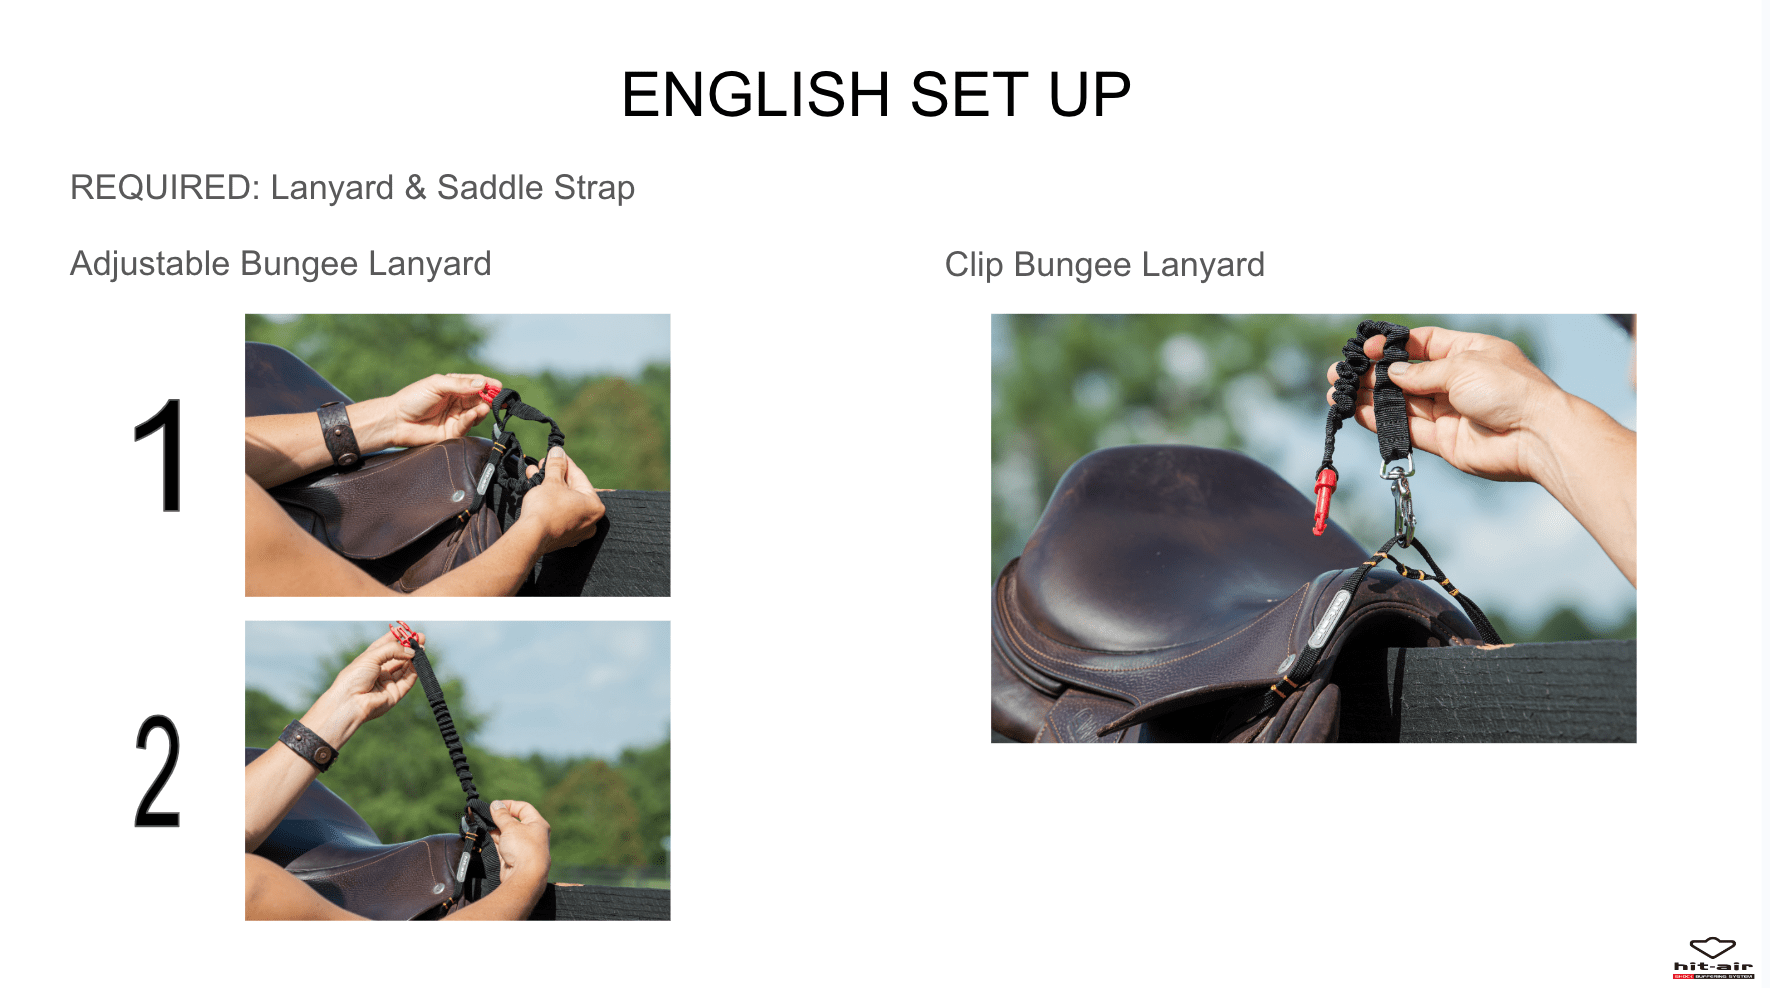
ATTACHING YOUR SADDLE STRAPS AND LANYARDS
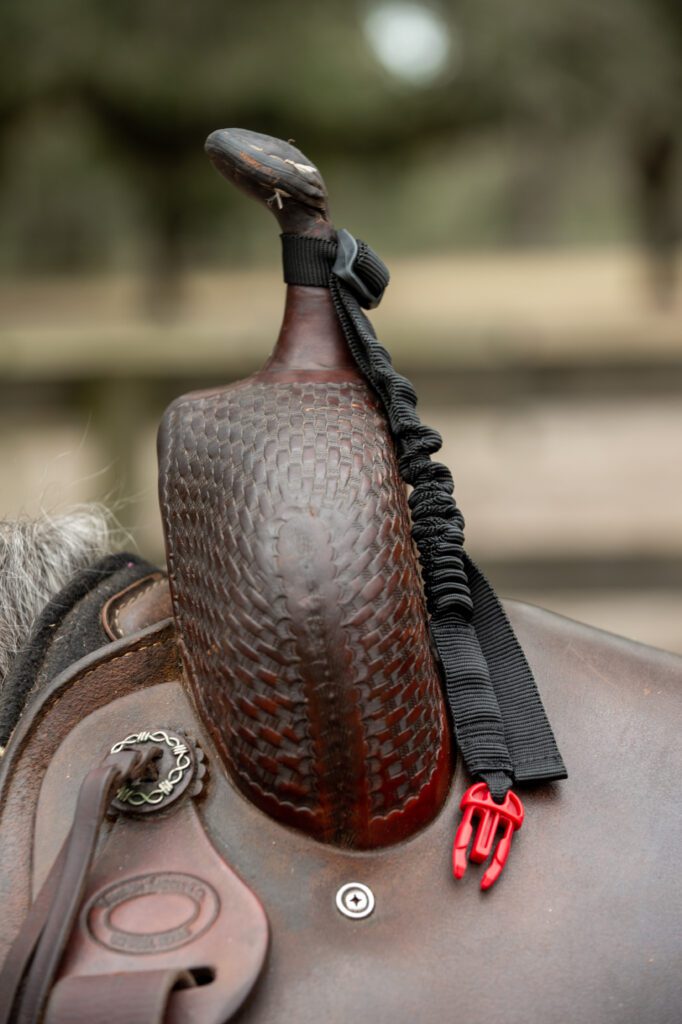
Western Setup Options
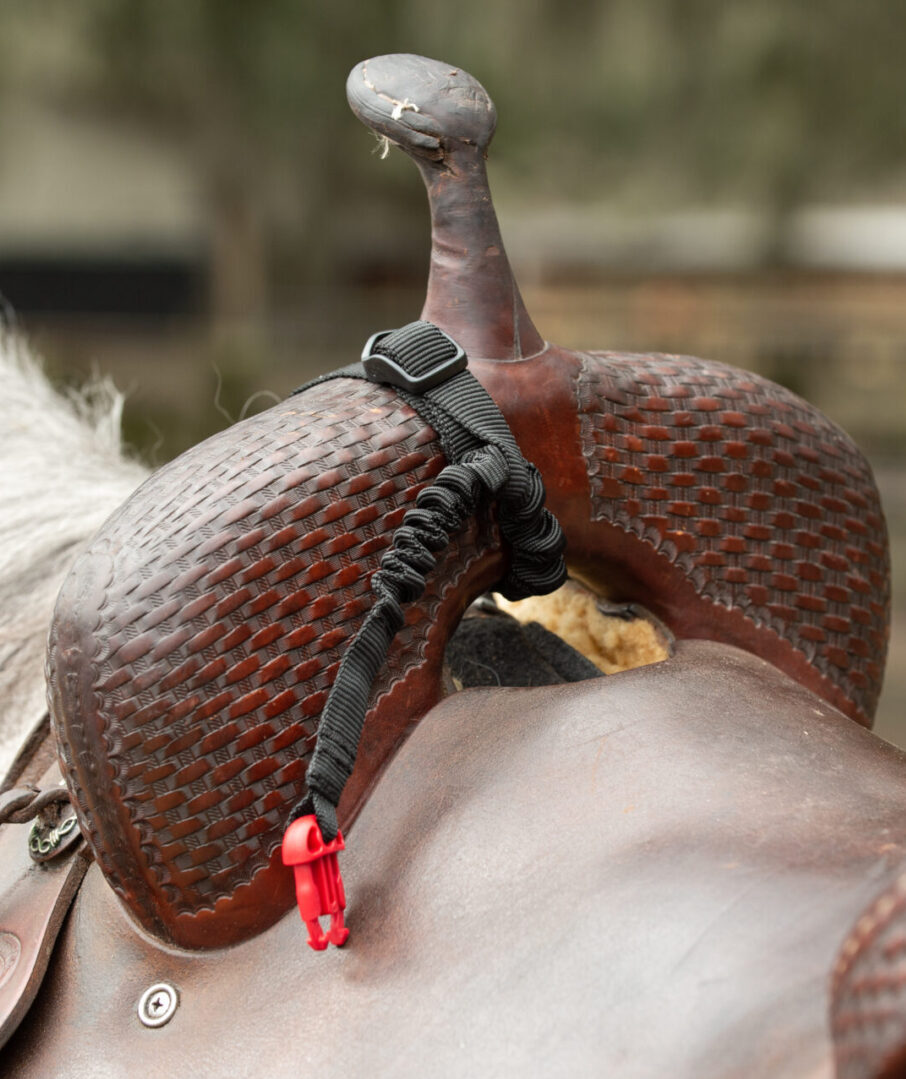
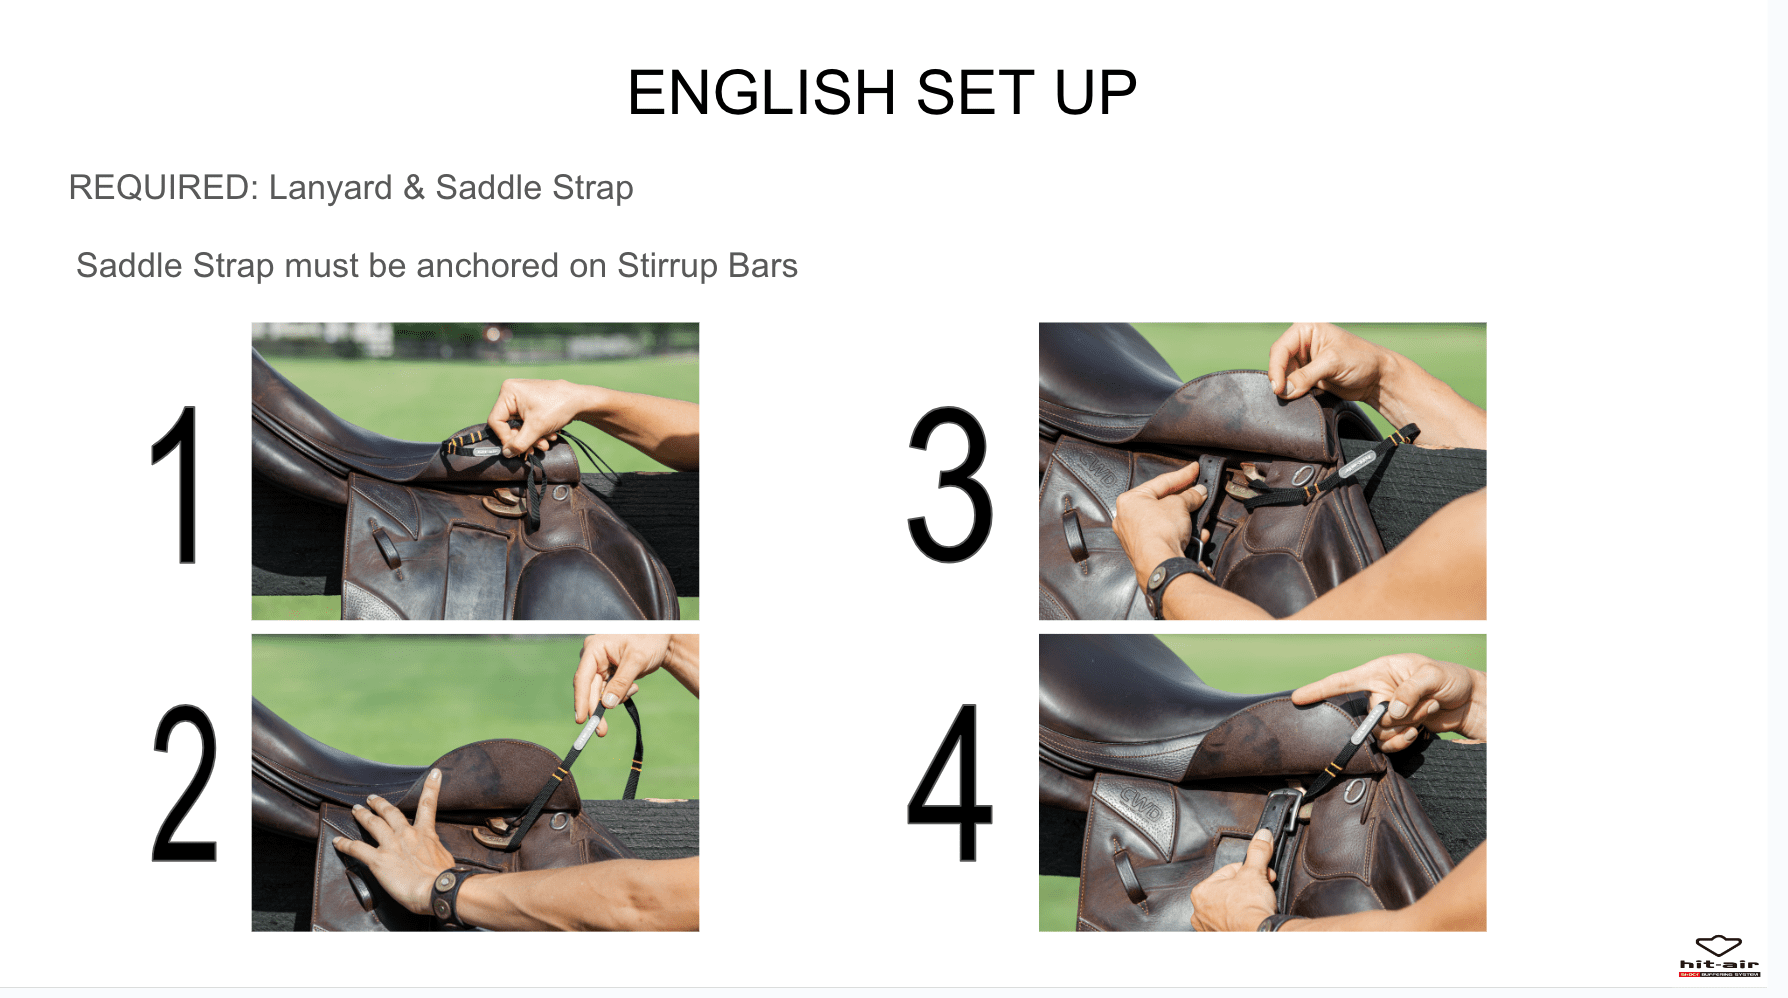
COMMON SET-UP MISTAKES
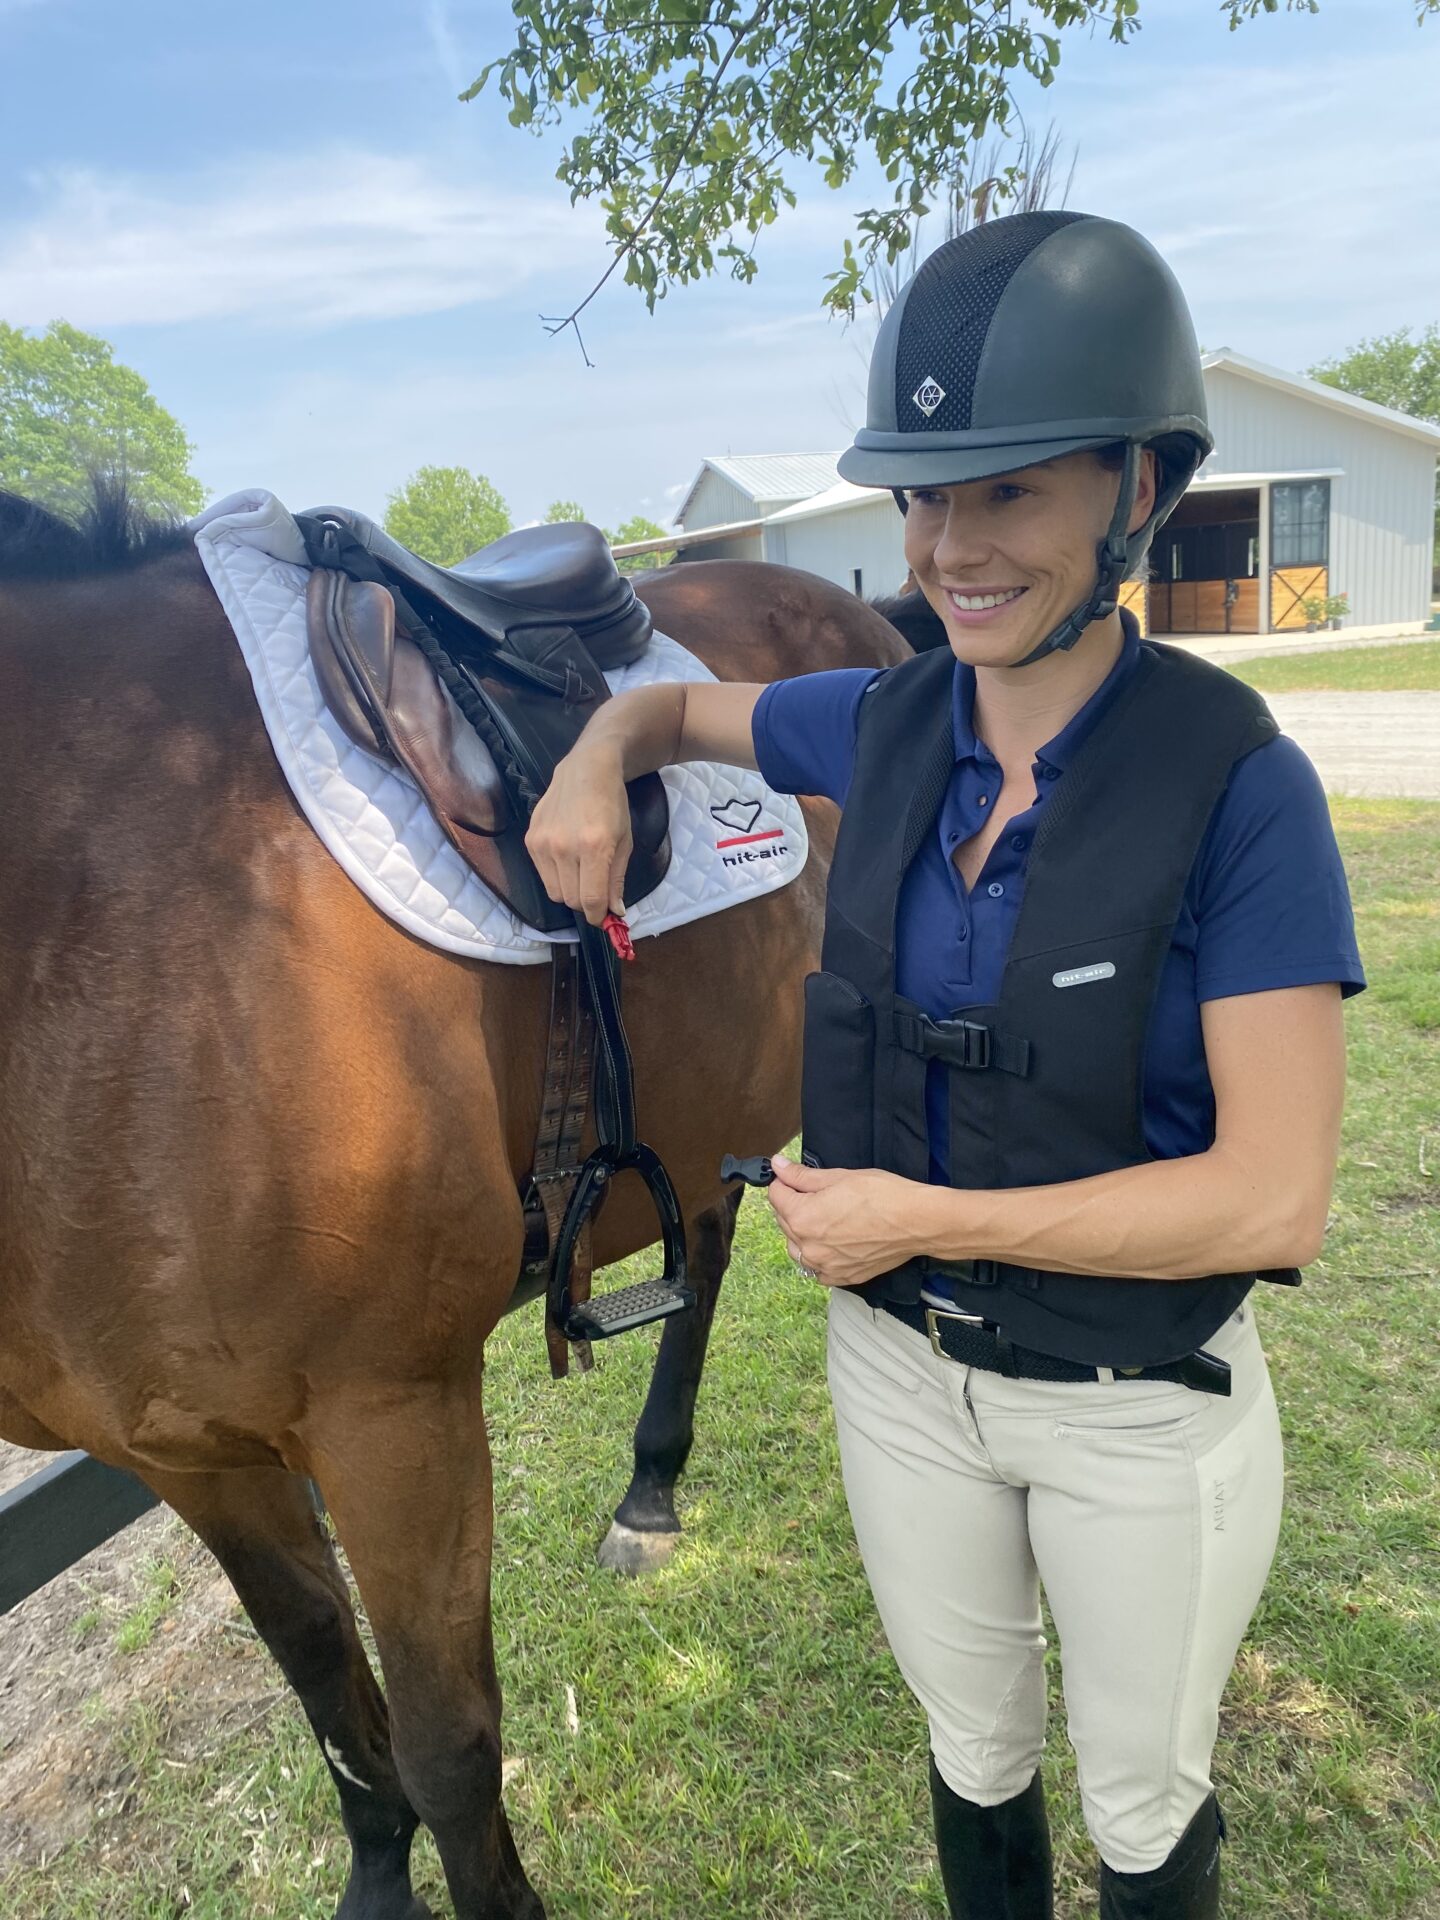
CORRECT - You are ready to ride!
ADJUSTING YOUR LANYARD TOO LONG
Adjustable Bungee Lanyards and Western Coiled Wire Lanyards must be adjusted before use. A properly adjusted lanyard should be long enough for the rider to move freely and comfortably in the saddle but short enough for the vest to deploy and fully inflate before the rider hits the ground in the event of a fall. The rider should NOT be able to stand next to their horse while their vest is clipped into the lanyard and attached to their saddle.
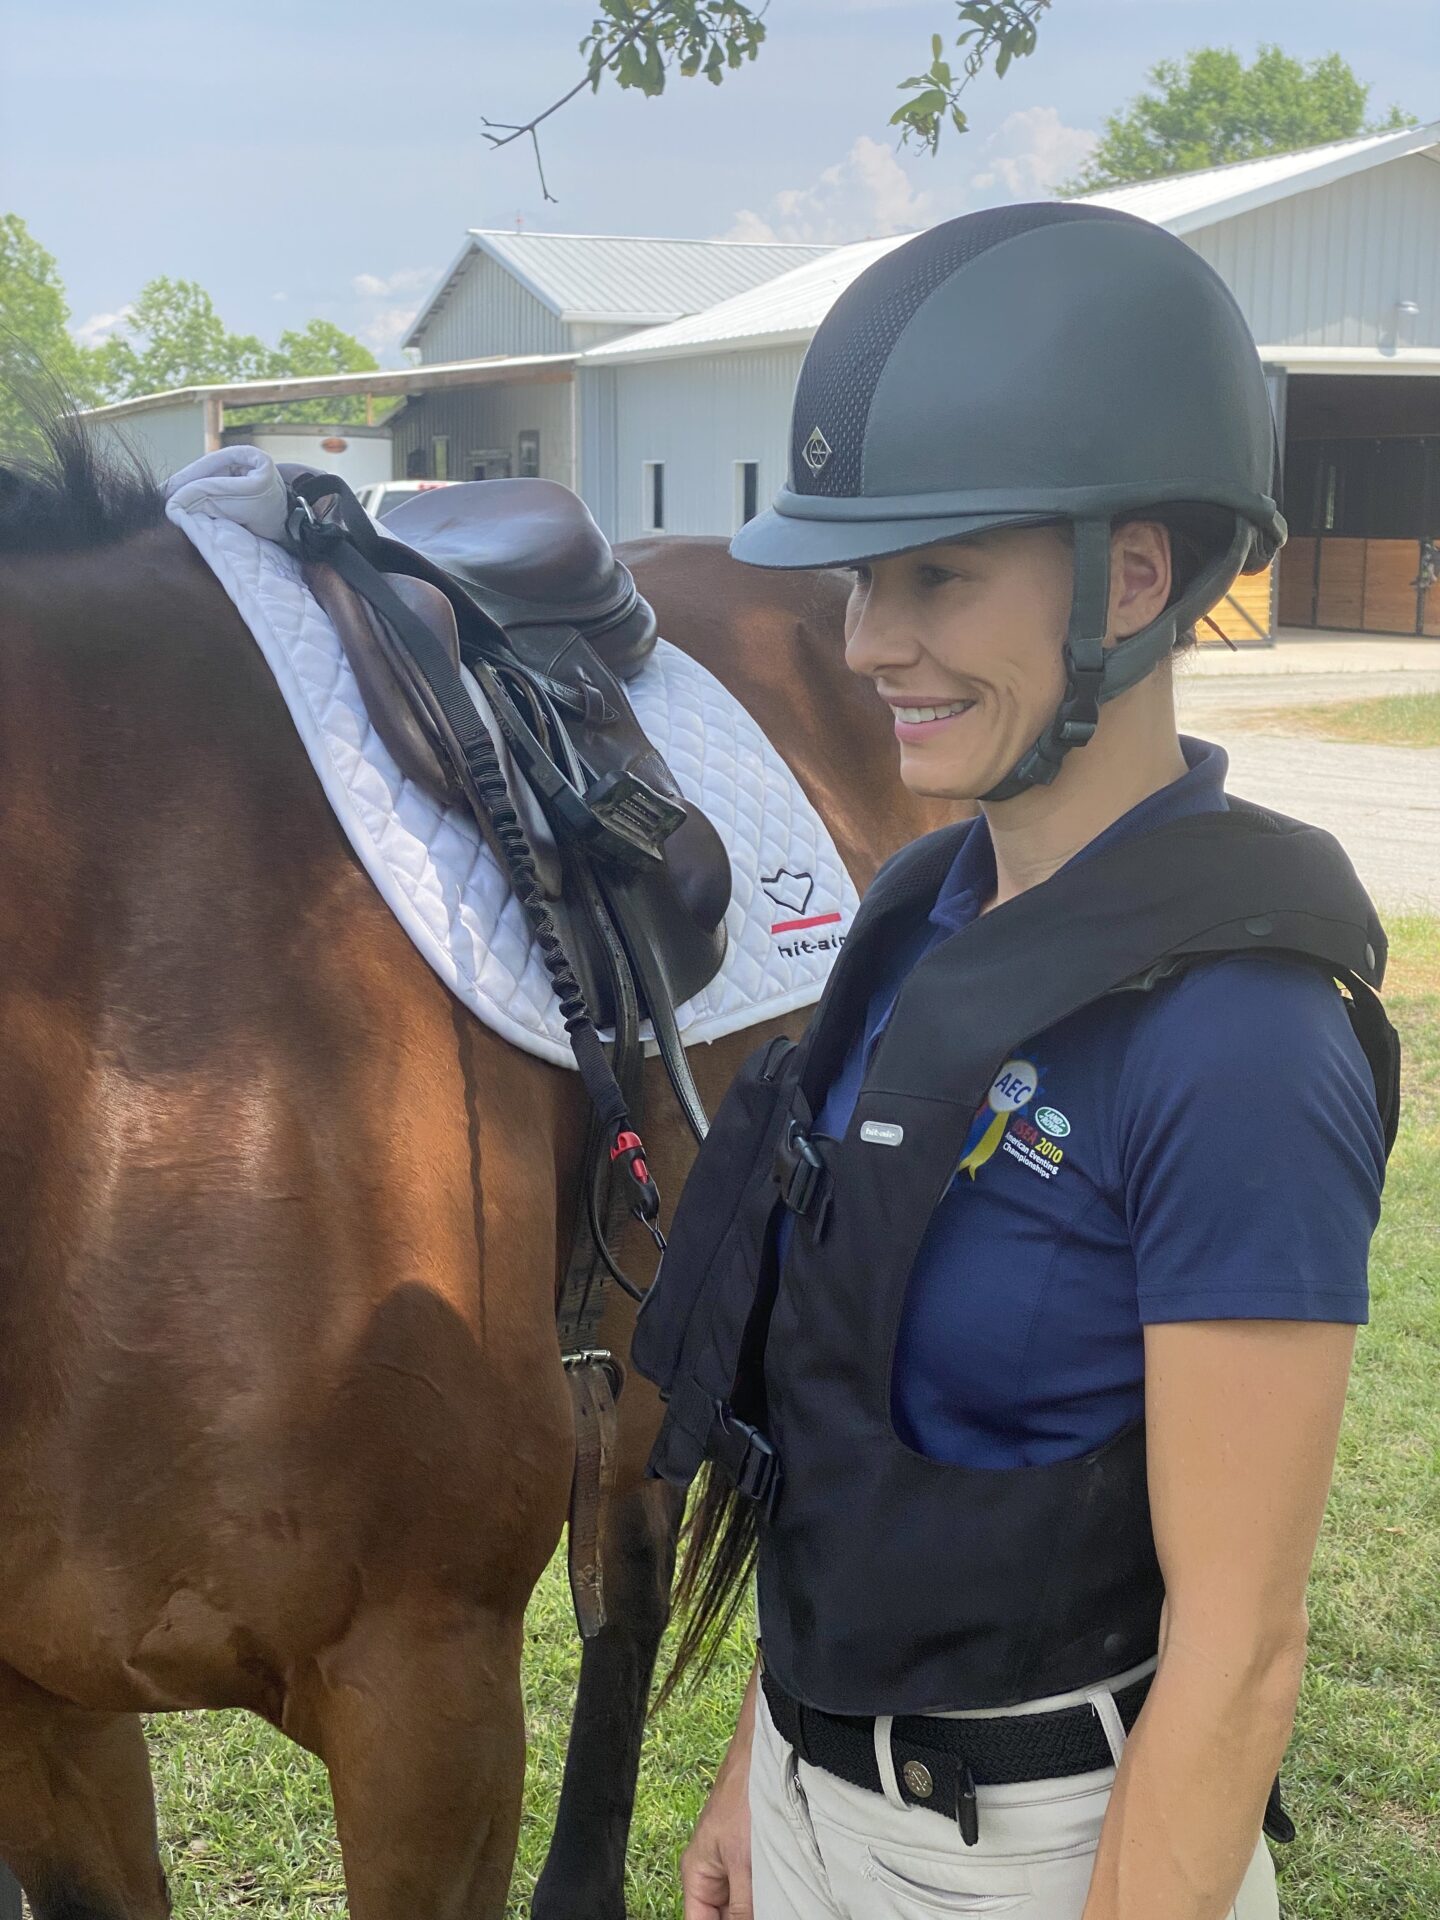
INCORRECT - Adjust your Lanyard shorter

